Making Korra's season 4 outfit
This marks the beginning of my descent ascent into cosplay. I was on the hunt for my first "real" cosplay. (I can't stress how heavy those quotes are, but it was an opinion I held at the time, and I wanted to note that even if I've since learned more, and have developed new opinions.) I'd previously put together Kaylee Frye for Halloween, but let's be real a second, I put it together for Halloween because I was too scared to cosplay in non-Halloween context.
So ...
Why Korra?
Well, first of all, Janet Varney, Korra's voice actor, was going to San Francisco Comic Con, and I thought it would be really awesome to rep Korra where Korra's voice actor was. I got a photo with her and her autograph!
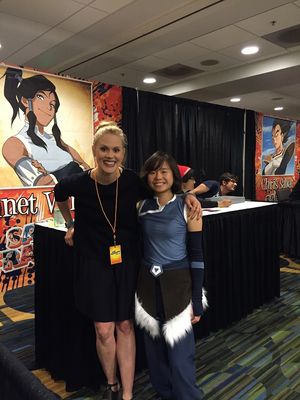
Look it's Janet Varney and me!
Oh, and I was trying to convince my roommate to watch the Avatar/Korra series for the first time.
And Korra's badass.
So, naturally, I picked the Korra they hadn't seen yet: Season 4 Korra. Why Season 4? Mostly because her hair and arm warmers looked possible. Plus, her new boots are sleeker.
The series has been out for a while, so I figured there wouldn't be that many Korras running around, but she probably still had high recognizability.
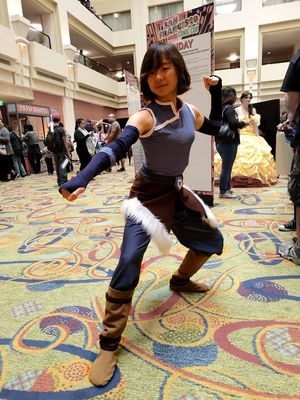
One of my few full body photos! Complete with hotel carpetting.
And ... there were ...
A lot of tutorials
Lots of people have put together Korra costumes, and there are so many resources for how to put together this costume. Here's my callout list.
- Korra (Book 4) Cosplay Construction Notes
- In which I found out the pants were ... greyish? I subsequently spent a lot of time trying slate blue sweats fabric.
- But this has SO MUCH INFO and SO MANY PICTURES. It also starts with "So this cosplay was pretty easy to construct." Win.
- I didn't understand the shirt part at all. Now that I'm putting together this list, I'm realizing it's suggesting to actually make the front flap a ... guess what ... front flap. *FACEPALM* Well, next time ...
- I was sad that the boots called out were not available by the time I came across the post, but in the end, I was quite happy with my footwear situation!
- Video Tutorial Series
- SUCH respect for youtubers.
- I ended up making the shirt myself, but using the tricks here for sewing the white trim / ribbon on.
- Pants were explained in a way I pretty much understood.
- Found out here that the Season 4 skirt was different. Welp! Cool.
- Boot tops
- Slipper Tutorial
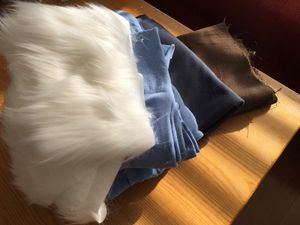
Fabrics!
Three ways making Korra's outfit broke my mind
(Or things I learned.)
If you copy your pants pattern from existing pants ... Be warned! Pants shouldn't have two butt sides. The front and backs of pants are different. Maybe I wasn't paying attention to the tutorials, but I copied the same side twice. So, net result, the pants I made can't be worn backwards (even though my roommate who wore it to Fanime claims they could tell which side was the butt-side). I decided this wasn't a problem because it'll be covered by an APRON.
Hiding pockets is the most amazing. I didn't have to carry around a bag. My phone, keys, wallet were all on me! I got the idea from Stashbusting Korra from the Fabric Alchemist. Turns out "stashbusting" doesn't actually mean sewing in hidden pockets to stash things to prevent others from seeing they exist and then you can bust it out later. Yeah, okay. That sentence didn't make sense to you? Writing it down, I realize it makes no sense to me either. And if I ever looked at Amon's costume, I would've realized how ridiculous it is to hide a pocket in a BELT. What are you going to put there? A microwhip? But, nonetheless, because of this article, I got the idea to make the apron a kangaroo pouch, so thank you!
You can cut fuzzy fabric reasonably if you cut at the base of the fabric instead of trying to cut over the fuzz (after combing it down so that the fabric is "flat"). Thanks Wendy!
Some other discoveries I made
- Stretch material is amazing to wear.
- Arm warmers are amazing to wear (and keep you warm)
- Bias tape is amazing for finishing edges. (But stretch fabric less so.)
- Irons are amazing (especially for making bias tape).
- Colored contact lenses are fun, but the ones I got were the sort that sort of blended into your existing eyes, so no one would've known I had blue contacts unless they got close enough to stare into my soul. (Doesn't matter! I know)
- Going to sleep at 3am between day 1 and 2 because you stayed up making SHOES because you disliked the fact your black boots didn't really fit Korra's costume and saw really awesome outfits whose shoes really complimented them and hated the fact yours didn't... (That's not really a discovery. Maybe it's that -- shoes really make an outfit?)
Specific notes on constrution
Arm warmers
- WTF was I thinking, trying to do a rolled hem for the thumb hole when I didn't even do that for the rest of the arm warmer? It just added bulk to the thumb area and made it stiffer.
- My light-blue straps are coming apart. There isn't a lot of fabric and therefore not a whole lot of room for stitches. Backstitching probably would've helped a lot, especially 'cause this part gets stretched over the arm. And it puts pressure on the seams.
- The fabric is a ribbed knit that I also used for the apron. The straps were from the shirt fabric.
Top
- BIAS TAPE!!! Made the finish on everything look clean (kind of*)! But basically impossible without an iron. Or ... bias tape maker? (I just bought one 1 year later... still haven't used it because I hid it too well in my pile of scraps to find at 2am.)
- kind of* qualification: Using a stretch fabric for bias is hard. I have no idea how you're supposed to turn corners.
- Having a high neck is hard. I have no idea how to keep it consistent across the neck. Or get it to stay up. I hear interfacing makes things stiff? Interfacing scares me. Someone teach me, plzktanks.
- Fabric was some garbage knit that grew a hole in the front. Luckily, the white ribbon goes right over it. :D Nobody has to know.
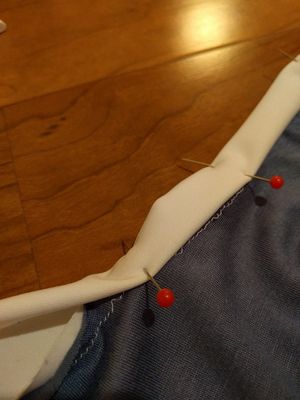
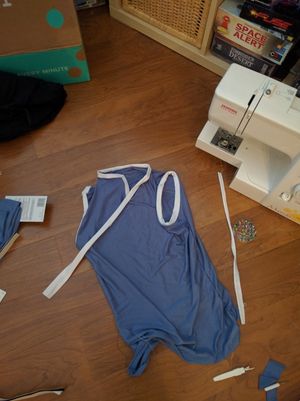
Adding bias tape to my shirt; and doing something funky with the bias tape to fake the front panel
Boots
- Why did I even do this? I just really wanted the boot colors and shapes to work. These were actually two pieces: a shin-cover and a slipper.
- I made the band for the shoe part larger, but I forgot I had to sew it in and didn't account for that allowance on top of sewing it into a tube, so it basically looks like the same width as the straps on the boot except that I specifically looked for screenshots of her boots (really hard, actually), and they look twice as thick. It also means when I wear it, there's a slight gap between where the shin-cover ends and the foot part starts.
- One hundred percent should have picked a lighter weight fabric for the dark brown straps. I used the same fabric I did for the skirt, which I wanted to be heavy. But. GAH.
- The shin-cover was literally held up by the straps, which wrapped around and were held in place with velcro. Except, don't buy stick on velcro. It sucks. Buy sew in velcro. I tried to fix the fact the stick on velcro stuck to itself better than the fabric by trying to hot glue it (didn't work), and then sewing it (which also didn't work, and bonus, I'm pretty sure it gunked up my sewing machine which now refuses to sew zig zag properly, or maybe it's the fact I was trying to make it zig zag through sequences).
Skirt
- Now I know how to cut fuzz. Thanks Wendy! This didn't prevent my room from looking like a cat exploded.
- The straps are long and thread through the buckle.
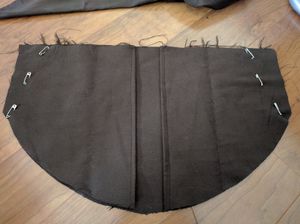
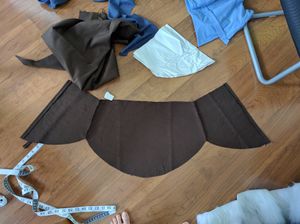
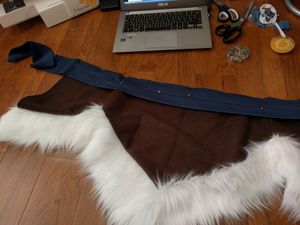
Skirt making progress pics
Buckle
- It's basically a little fabric loop that has some shape because I shoved a 3D printed pentagon into it.
- Turns out, my 3D print actually failed, but this made it even better! It had a rough crosshatch finish instead of a smooth finish, so it had some grip on the strap fabric that's supposed to run through it!
- I just glued more fabric cut to the right shapes on top of each other. The fact that this means the seams are unfinished bugs me. Just a little. Not enough to think about though.
Apron
- Made this a step through instead of a tie. Seemed much easier to handle.
- I made it two layers and sewed the sides and bottom together, leaving the top open. This lets it also serve as a kangaroo pouch. Perfect for shoving a phone in, which also causes the apron to hang properly and makes the bottom point pointy!
Pants
- Okay. Seriously. Why did no one tell me that the backs of pants and the fronts of pants were different? Does everyone who's sewn pants already know this? Does everyone who's sewing pants for the first time know this? WHY DID NO ONE TELL ME?
- But[t], okay, the point is this Korra has two butt-sides, which means there's a LOT of extra fabric in front.
- I didn't end up redoing them because they'd be hidden behind the apron anyway.
- I also didn't finish the bottom because they'd be hidden in boots anyway.
- I made the top band really high up, and folded it over A LOT. Like ... a foot? Whoops. Better than not having enough fabric?
Hair
- I now know the words "asymmetric bob with side swept bangs." I didn't want to show the hairdresser a cartoon picture, and didn't really know these words ahead of time, so finding example pictures was, well, a little hard. But worth. Who doesn't wanna feel a little bit like Korra every day?
- I bought a flat iron. Have I used it since? No. I discovered that I can basically blow dry my hair straight with a brush.
Reference Images
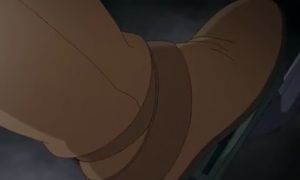
Zoom in on my empty wallet boot
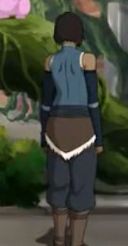
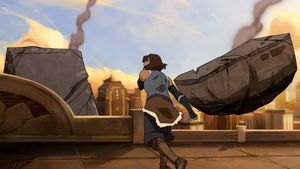
Capturing Korra's colors
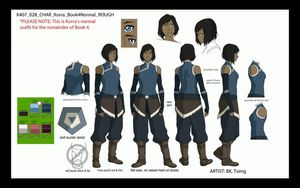
Outfit reference I found on Pinterest
SO WORTH IT
I got to meet Janet Varney. Heard her talk on a panel. She is hilarious. I got to meet awesome people. I got to throw punches at so many cameras.
And the outfit got used AGAIN. My roommate borrowed it for their first con (awwww). It was a good thing I made the pants infinitely long (they're taller). And I got to borrow their shirt for Minami (but I guess that's a different blog post that will take me another four years to finalize).